I am LOVING this Bow Tie Neck Pillow pattern I found at Sew4Home.
Super easy, used scrap fabric and so comfy! I am not the best photographer so forgive me! I made 2 in under an hour! ( I new my BF would steal mine so I made him one too!)
I did do a variation where I sewed in a zipper to put the stuffing in ( I loathe hand sewing closed pillows) I also put a little bit of dried lavender inside too for a soothing scent!
Here is the link to the instructions: http://www.sew4home.com/projects/pillows-cushions/relaxing-therapeutic-neck-pillows-fan-favorite
Give it a try and let me know what you think!
Love your life- love what you do. I love to make my own accessories and clothing. I take inspiration from all over and always try new things. I am a beauty product junkie and love to uncover deals at the dollar stores. My passion for sewing is a never ending and will always be in my heart
Showing posts with label fabric. Show all posts
Monday, March 2, 2015
Thursday, January 8, 2015
My First Pair of Panties!
I signed up to take BurdaStyle Academy's Sew Your Own 8 Pc Lingerie Collection.
The below is a High Classic Brief that I drafted and sewed. This is the 2nd one I actually made because the 1st pair was a test for ease and was wayyyyy to big!
Wednesday, March 21, 2012
Knit and Woven Spring Tunic
I have had this floral polyester fabric remnant for quite some time. I was drawn to the print but just could not decide what to do with it. I was going through my bag of rags plastic tub and found the red knit fabric. Ding! I will make a tunic that has a waistline seam. I had just enough of the red fabric for the bodice and sleeves. I also had just enough of the floral for the skirt. I had a stash of red taped metal zippers that I snatched up on clearance. I found a silver teeth one and tried my hand at an exposed zipper. I have never applied a zipper this way and it was quite interesting.
I was surprised with the outcome. I tried it one just for ha-ha's to see if it would fit. Wouldn't you know, it fit and it was a perfect tunic length for my body.
| I decided to add a belt for extra oomph |
I was surprised with the outcome. I tried it one just for ha-ha's to see if it would fit. Wouldn't you know, it fit and it was a perfect tunic length for my body.
Labels:
bag of rags,
exposed zipper,
fabric,
Floral,
knit,
pattern making,
sewing,
tunic
Sunday, February 26, 2012
1 Yard Wonder
I love when remnants are 50% off at Joann's Fabrics. I found this gold stretchy fabric and just had to snatch it up. I wanted a flashy going out top. I put my pattern making skills to the test and came out with a success. I decided to make a belt out of remaining fabric, but this top can go sans belt if need be. 1 yard of fabric + approx. 1 1/2 hours of pattern making & sewing = a fab draped top.
Labels:
1 yard,
fabric,
Joann Fabrics,
pattern making,
remnant,
sewing,
top
Friday, February 24, 2012
Infinity Dress!
Sunday, December 18, 2011
I Smell a Crafted Gift: Part 2
For Part 2, I wanted to show work in progress photos on how I made the sachet.
Viola! Use as gift or keep for yourself.
| What you need: outside fabric, scrap fabric for potpourri pouch, scrap contrast fabric, vintage earring, pin back, and potpourri (I chose Lavender). |
| Bind the raw edges of the short sides of fabric. |
| Fold in half, right sides together, then sew up sides and bottom. Clip corners and turn right side out |
| Use the scrap fabric to make a pocket for the potpourri. Sew up three sides, put the potpourri inside, and sew up the last side. |
| Place the pocket in side pouch. Replace the earring back with the pin back. Fold down the top edge of the pouch and close with the pin. |
Wednesday, December 14, 2011
I Smell a Crafted Gift
I wanted a way to use up fabric scraps, trims, and pieces of jewelry; more or less a reduce, reuse, recycle product that it not hokey. I searched for ideas and came across ideas for sachets. I decided to use a printed burlap fabric for the outside. I used scrap muslin to create a pouch for the sachet (I chose a Lily of the Valley fragrance). I used a vintage earring and replaced the clip with a pin. I folded down the burlap fabric and closed the pouch with the once earring now pin. I decided to add a lace bow for a little more character. Since I am gifting this, I wanted the receiver to be able to change the sachet if they do not like the fragrance or if the scent dissipates.
Tuesday, August 16, 2011
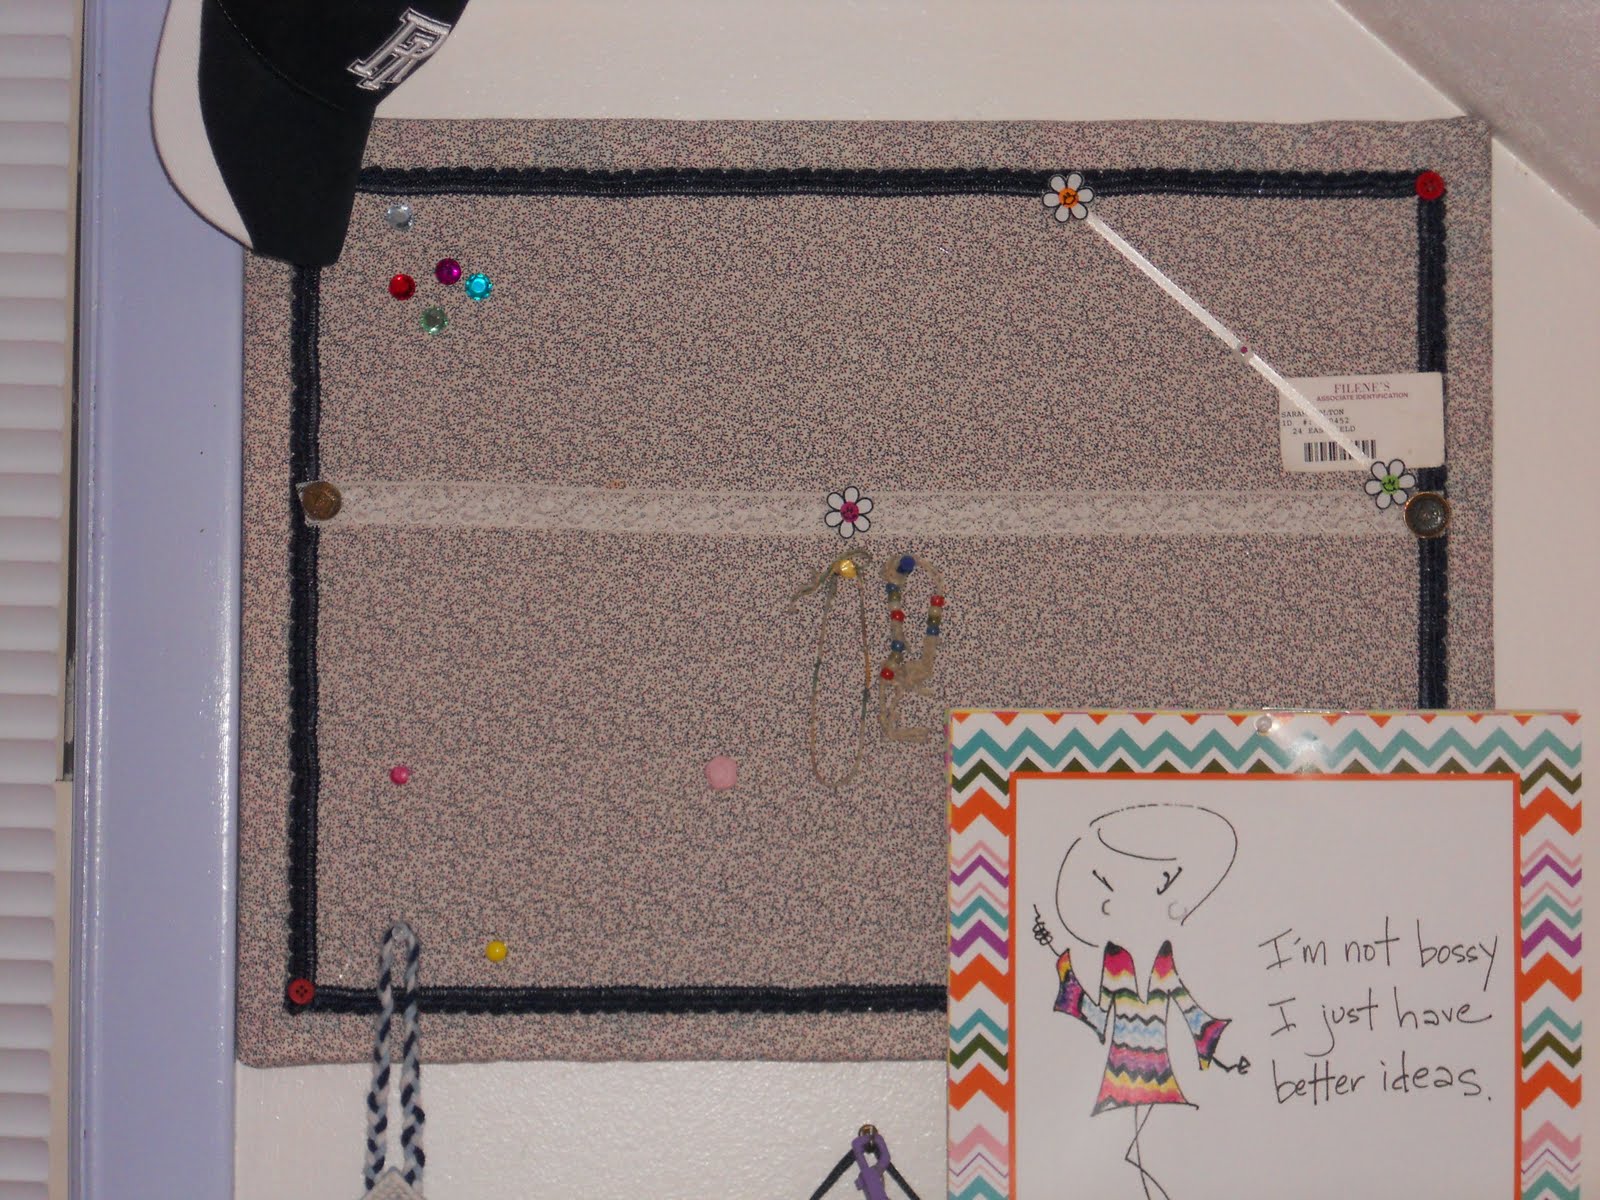
Cork Board Gets a Face Lift
I was cleaning and dusting my room today. I decided it was time to de-clutter my life of childhood/teenage paraphernalia and that included my cork board. I was probably around the age of 11 when I first covered my cork board with fabric. I was into a rainbow glitter at the time. After 11 years it was time for the cork board to get a face lift. I was first removing old items, including a collage of *NSYNC picture clippings when the hook came of the wall. I guess it was the board telling me it was time. I ripped off all the old fabric, ribbon, and accessories. After about an hour of work, ta-da! A new board!
How did I do this you say? I cut a piece of fabric slightly larger than the board. I have bins and bins of fabric so I pulled a cute calico from one of them. If you need to buy some fabric around 1/2 yard should do it depending on the size of your cork board. I first stapled the fabric to the right side of the board at the intersection with the frame. Next, I flipped the board over, wrapped the fabric around and secured it with hot glue. I also stapled the fabric to the back as well for extra security. I hot glued some trim to cover the staples, added some lace, and buttons. I hung the board up using command picture hanger strips.
Subscribe to:
Posts (Atom)